Uploading files to Azure Blob Storage in Blazor
Azure Blob storage service is one of the most used services on the Azure ecosystem, it allows you to upload a lot of files to the cloud while being super cheap. It also has an intuitive web that you can access them or download it by a direct link.
Overall quite a good service, I’ve been using it for both work and personal projects and honestly the best thing is the simplicity of how to make it work.
Most of the cases that I’ve used Azure Blob Storage is in the backend, directly uploading something that’s a result from an operation or something. So I don’t really have done any kind of upload a file from a website or so. Unlucky!
Since I’m a Blazor fanboy, I’m bringing you a way to upload files to an Azure Blob Storage using the native file input from HTML5.
Prequisites
- Azure account (if you dont have it go here to with a bunch of $$$).
- An IDE (VS, Code, any will work)
- .NET Core 3.0 or above
Creating an Azure Blob Storage
Go to your Azure portal and let’s proceed to create a storage account.
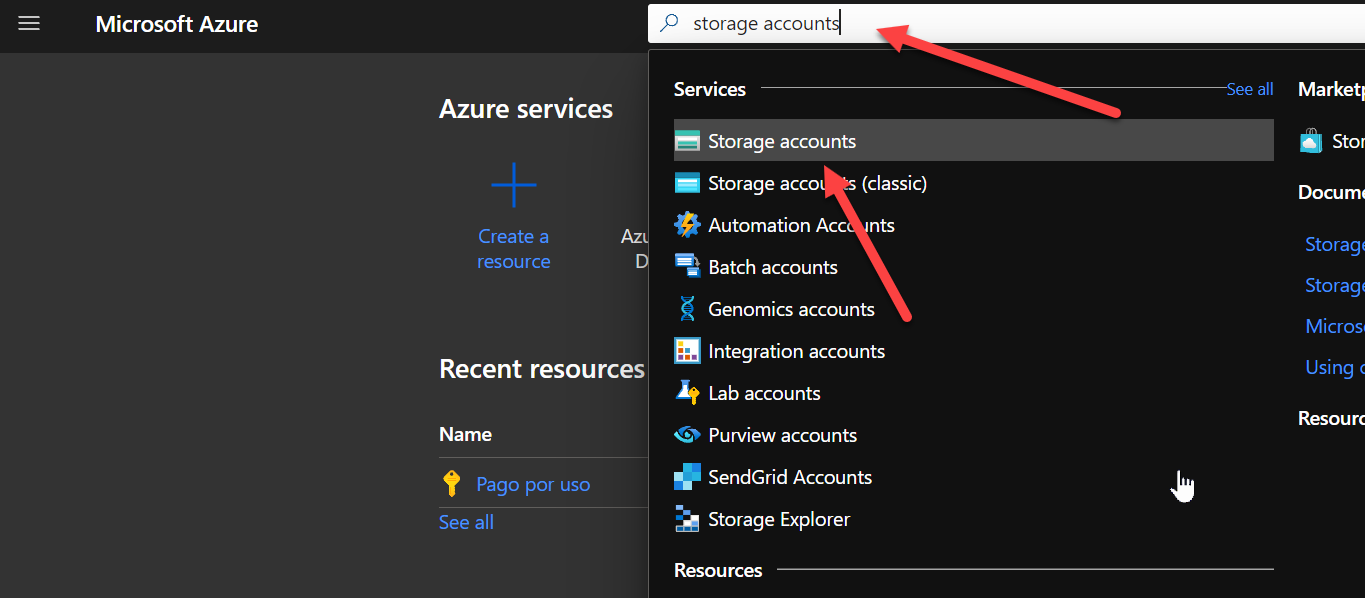
First search for Storage accounts and click on the result.
After it has loaded, click on Create.
A form will appear with a bunch of steps so go ahead and fill them.
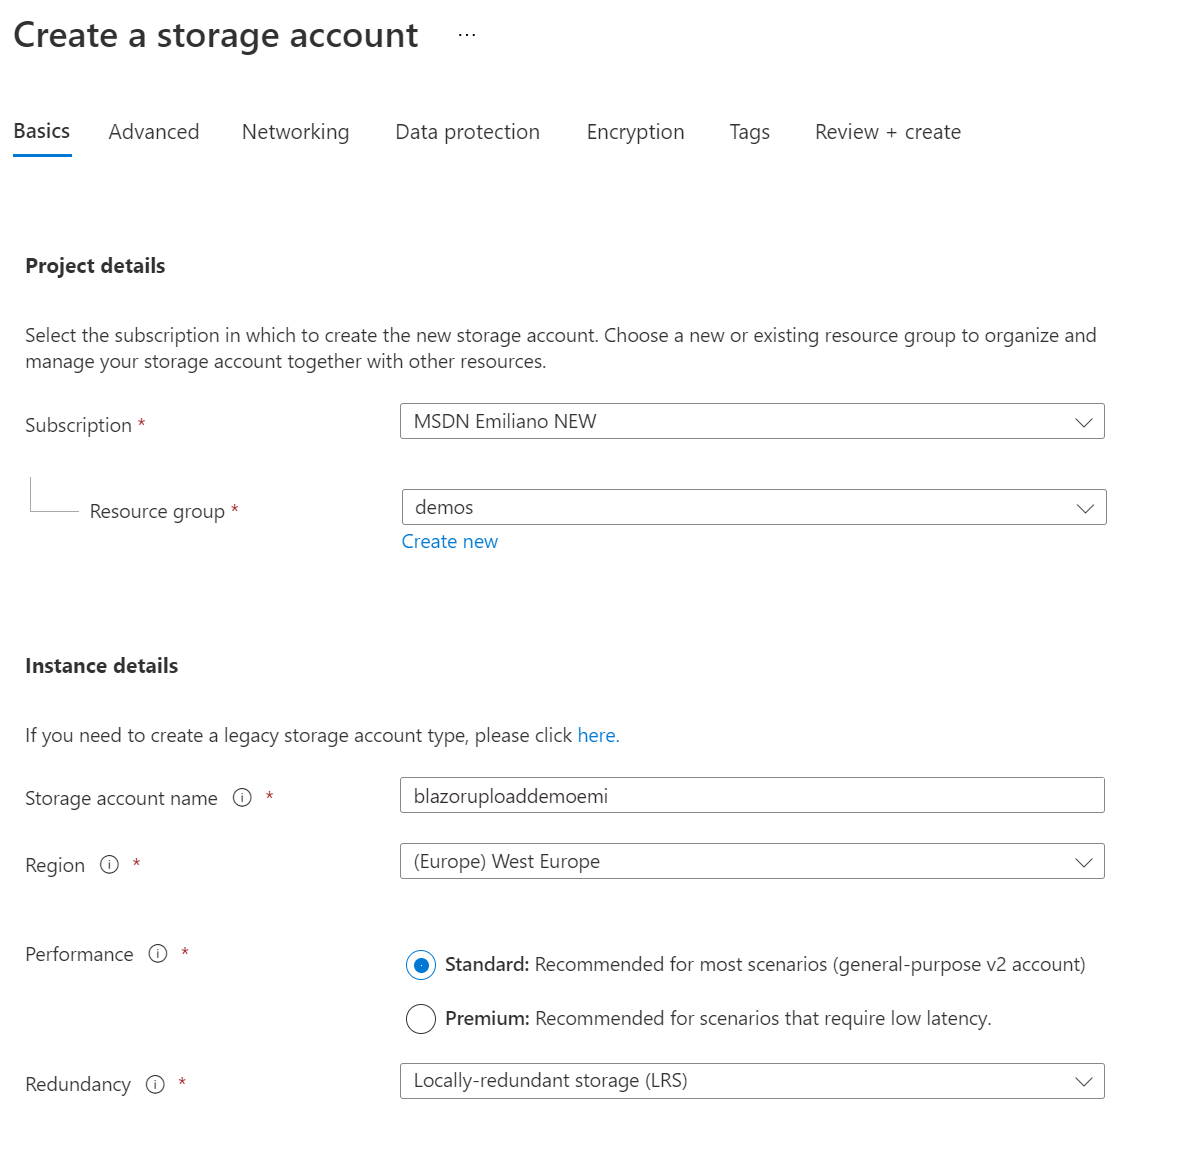
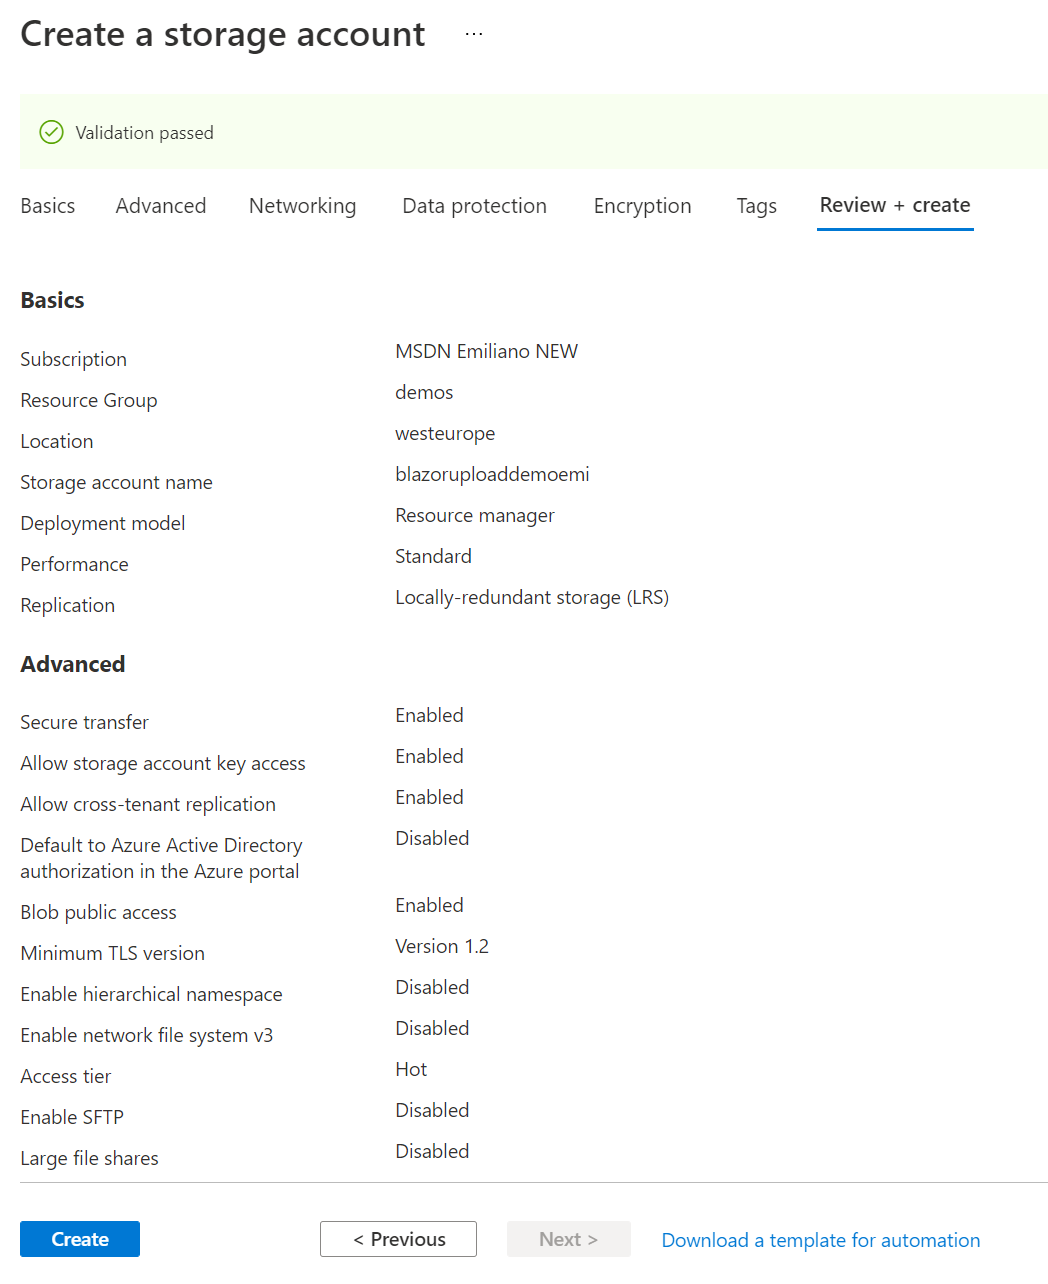
After filling everything with the settings you want, pass the validation and create the resource.
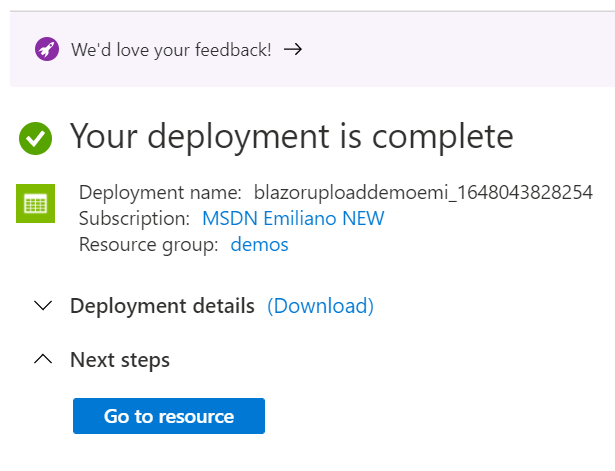
After it has been created, click on Go to resource. We are going to get a connection string that will let us play with the API.
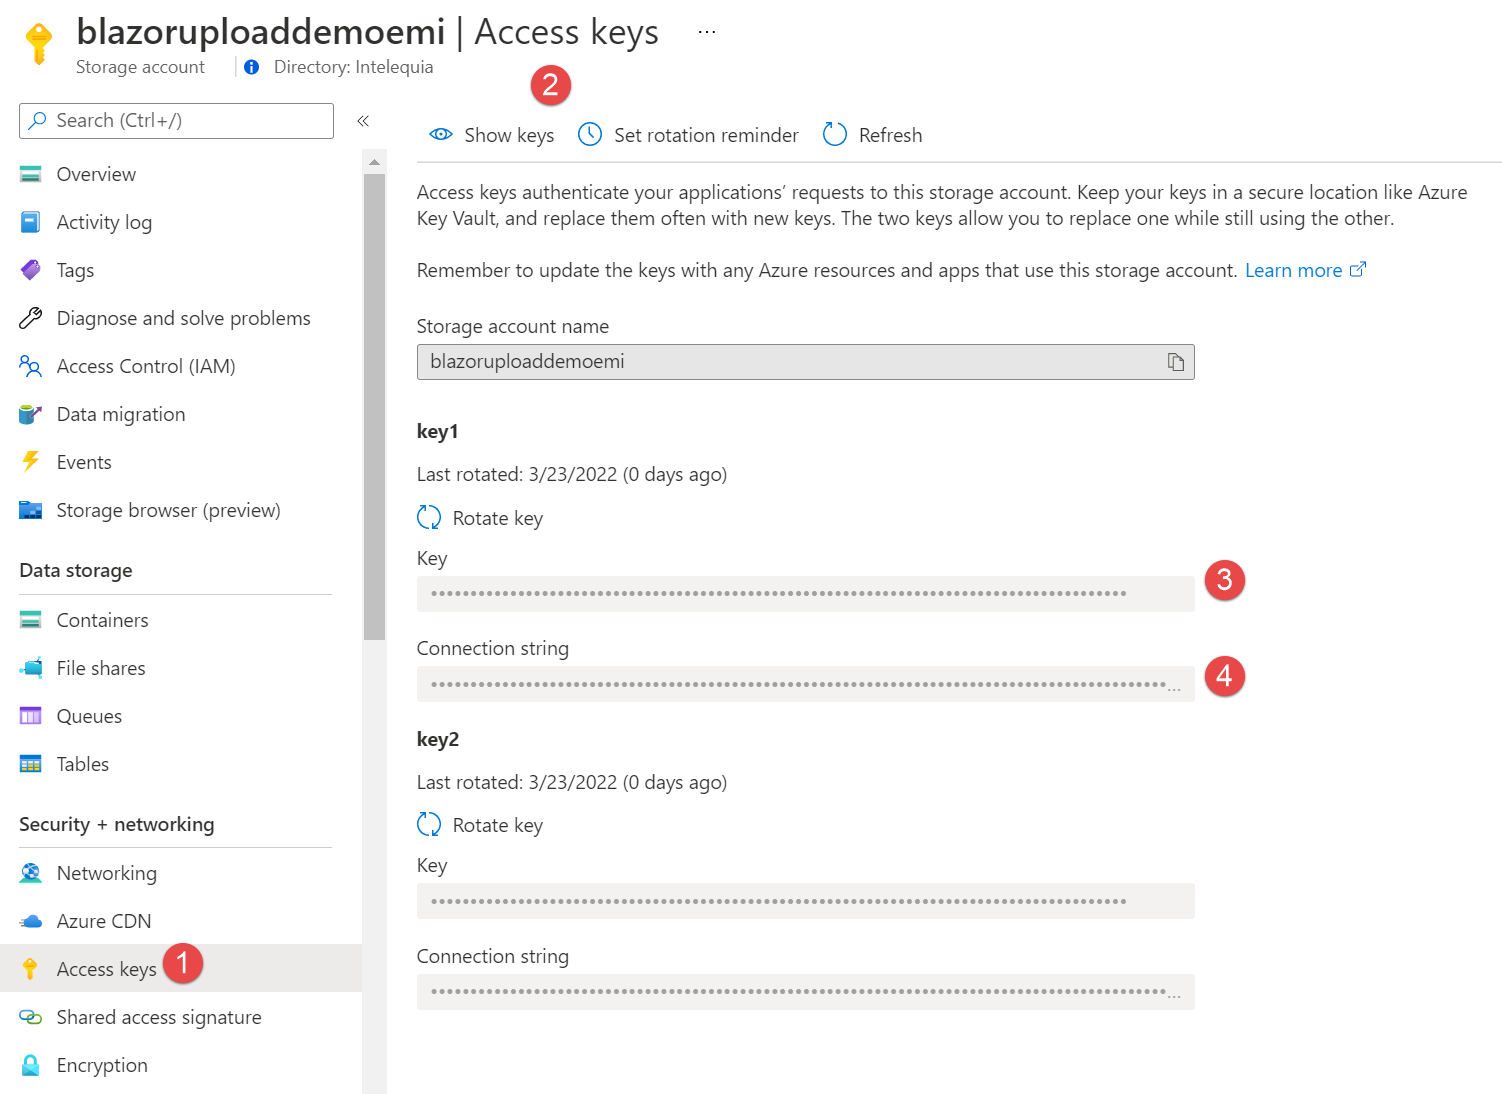
Get the resource keys
After we got to our newly created resource, go to Acccess keys under the Security + networking. After loading you will see a Connection string and Key, copy them because we are going to need them later!
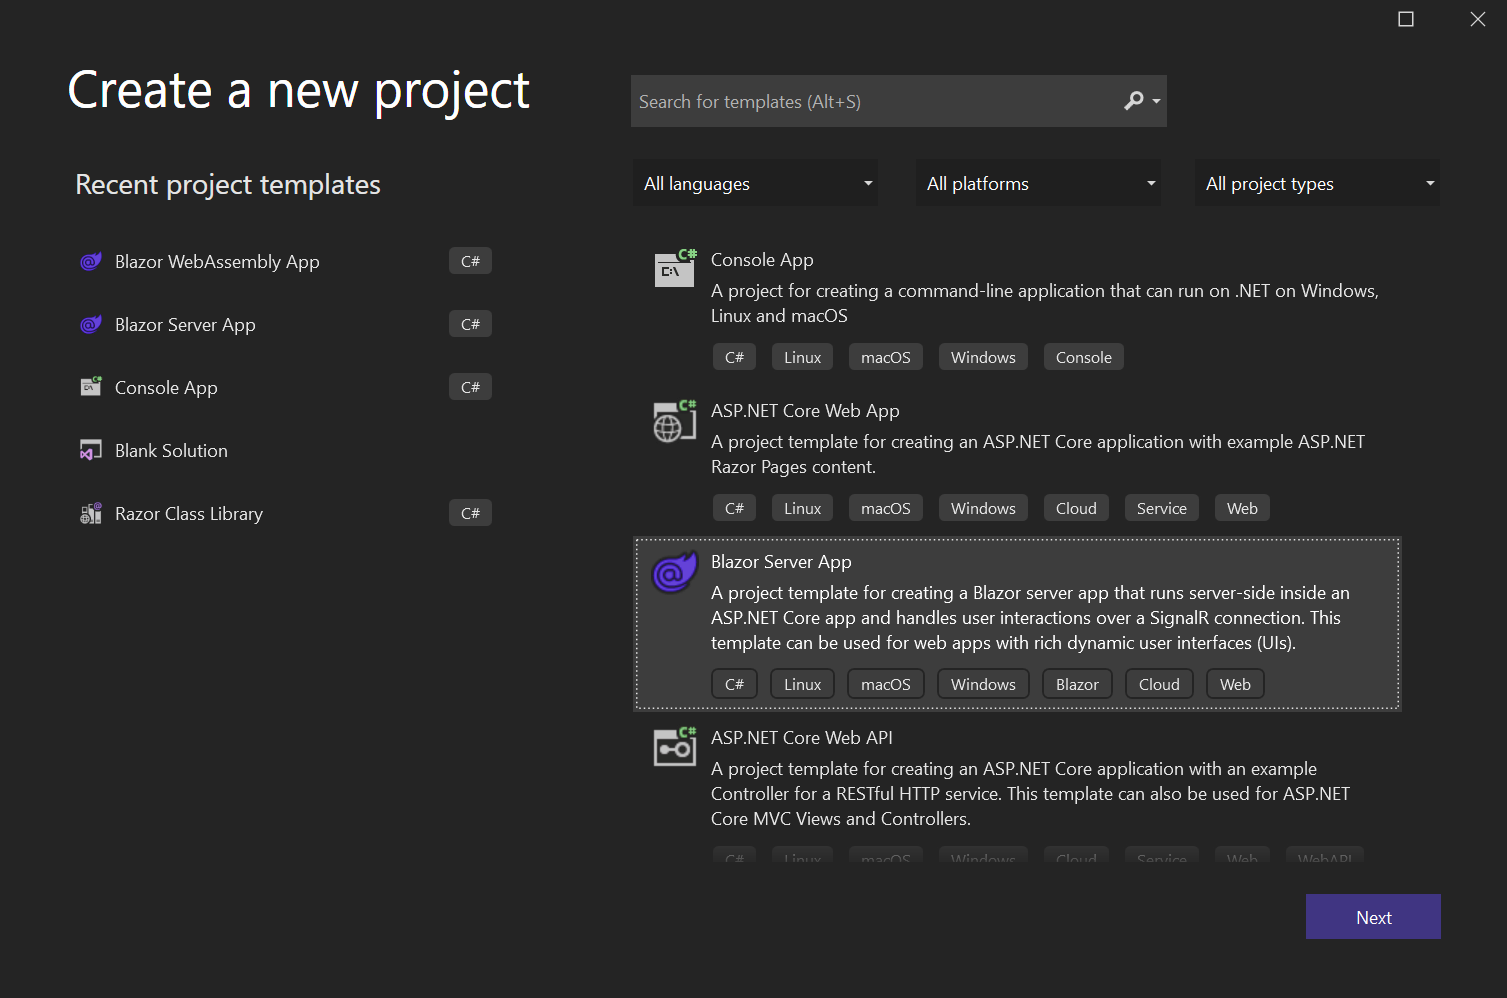
Creating a cool Blazor Server project
I’m going to be using Visual Studio 2022 for this tutorial, but as I said before, you can use any other IDE and just create the project using the dotnet CLI.
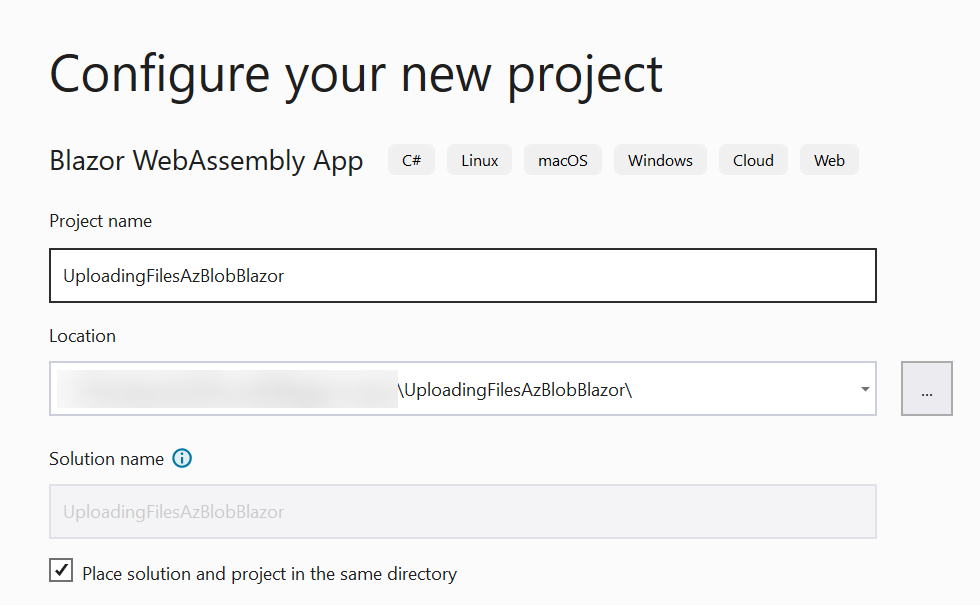
Then let’s go ahead and create a Blazor poject real quick using Visual Studio in just a bunch of steps.
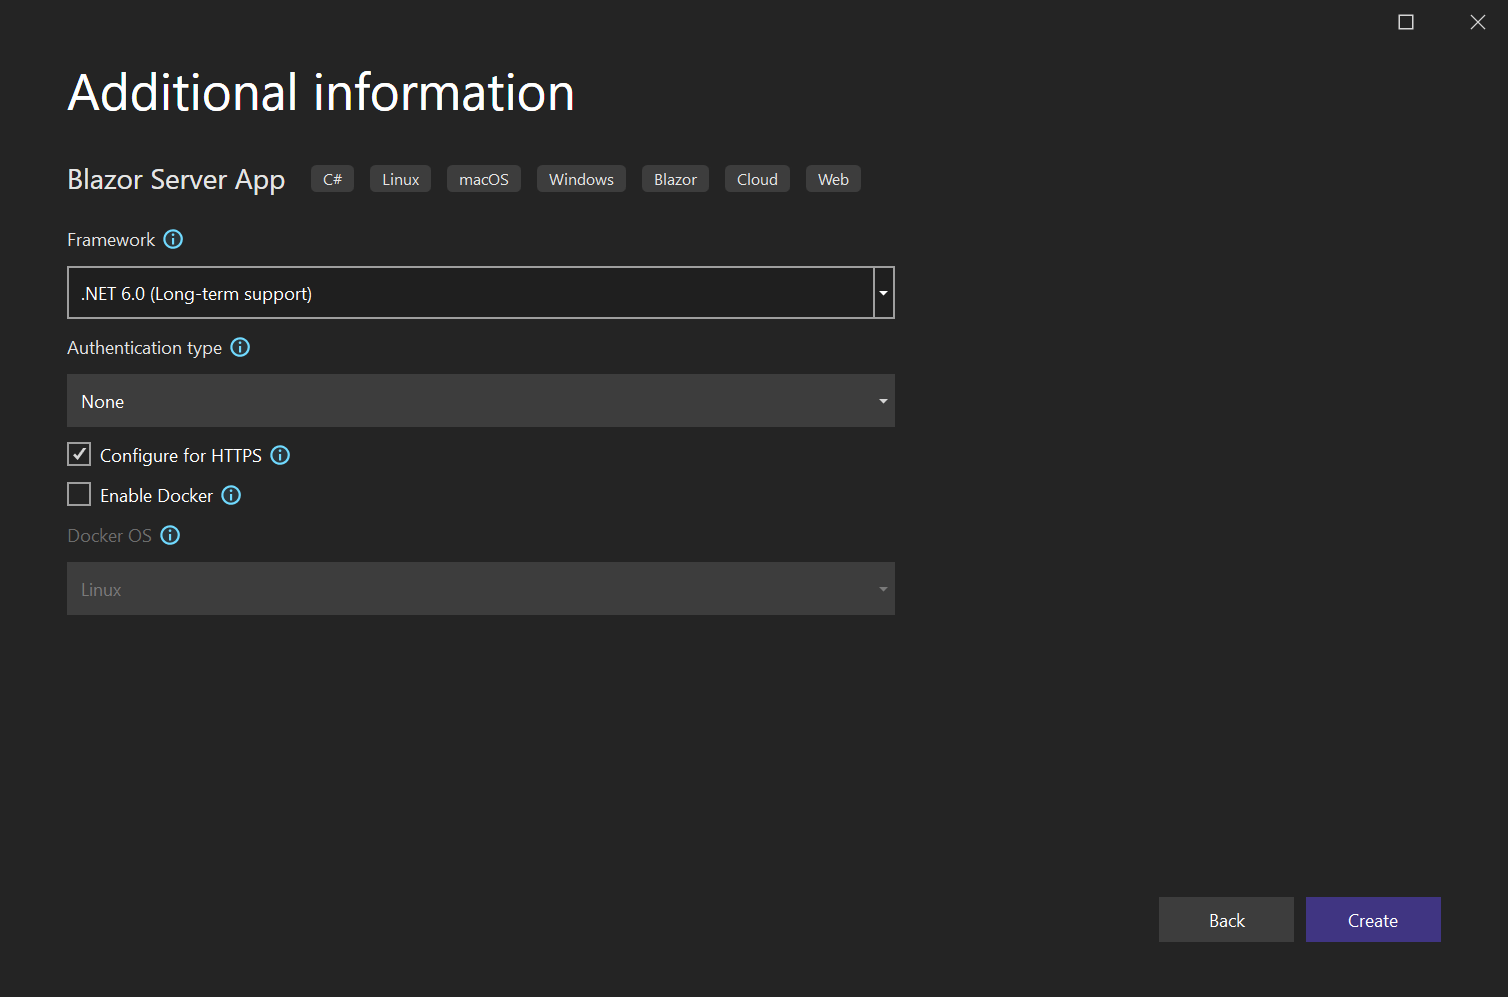
If we run what we just created it will look like this, just a plain normal Blazor application.

Now that we have the project created, let’s do some UI stuff so we have a new page with a bunch of inputs so we can fill with out keys from the resource, an InputFile for the file(s), a button to do something and a message that will result from the action.
Creating the Model
We are going to need some models to do this properly. First we will have the BlobRequest class that will handle the connection string, container name and the files.
Also, to keep everything neatly, we will create a class called BlobFile in which we will store the Name and the Data.
I’ve created a folder called Models so we have everything separated.
The classes are very simple.
using System.ComponentModel.DataAnnotations;

namespace UploadingFilesAzBlobBlazor.Models {
    public class BlobRequest
    {
        [Required(ErrorMessage = "Connection string is required")]
        public string? ConnectionString { get; set; }
        [Required(ErrorMessage = "Container name is required")]
        public string? Container { get; set; }
        public List<BlobFile>? Files { get; set; }
    }
}
namespace UploadingFilesAzBlobBlazor.Models
{
    public class BlobFile
    {
        public string? Name { get; set; }
        public byte[]? Data { get; set; }
    }
}
Modifying the UI
Now that we have our model created, let’s go ahead and do some magic on the UI with it!
First of all create a page under the Pages folder called Upload.razor.
In this page we are going to add a little form that will fill our BlobRequest class, so we have to add inputs for ConnectionString, Container, and Files.
@page "/upload"
@using UploadingFilesAzBlobBlazor.Models
@inject IJSRuntime JsRuntime
<PageTitle> Upload</PageTitle>

<h1> Azure blob storage uploader!</h1>

<EditForm Model="@modal" OnValidSubmit="@HandleValidSubmit">
<DataAnnotationsValidator />
<ValidationSummary />

<div class="mb-3">
<label for="connectionString" class="form-label"> Connection string</label>
<InputText class="form-control" id="connectionString" @bind-Value="modal.ConnectionString" />
</div>

<div class="mb-3">
<label for="container" class="form-label"> Container name</label>
<InputText class="form-control" id="container" @bind-Value="modal.Container" />
</div>

<div class="mb-3">
<label for="formFileMultiple" class="form-label"> Files</label>
<InputFile OnChange="OnInputFileChange" class="form-control" id="formFileMultiple" multiple />
</div>

<div class="mb-3">
<button type="submit" class="btn btn-primary"> Submit</button>
</div>
</EditForm>

@code {
    private BlobRequest modal = new();
    private EditContext editContext;
    IReadOnlyList <IBrowserFile> selectedFiles;
    private void OnInputFileChange(InputFileChangeEventArgs e)
    {
        selectedFiles = e.GetMultipleFiles();
        this .StateHasChanged();
    }

    private async Task HandleValidSubmit() {
        // This is where we are going to upload stuff !
        await JsRuntime.InvokeVoidAsync("alert", "Files uploaded!");
    }
}
It’s a bit of code but basically will render the form and handle the validation.
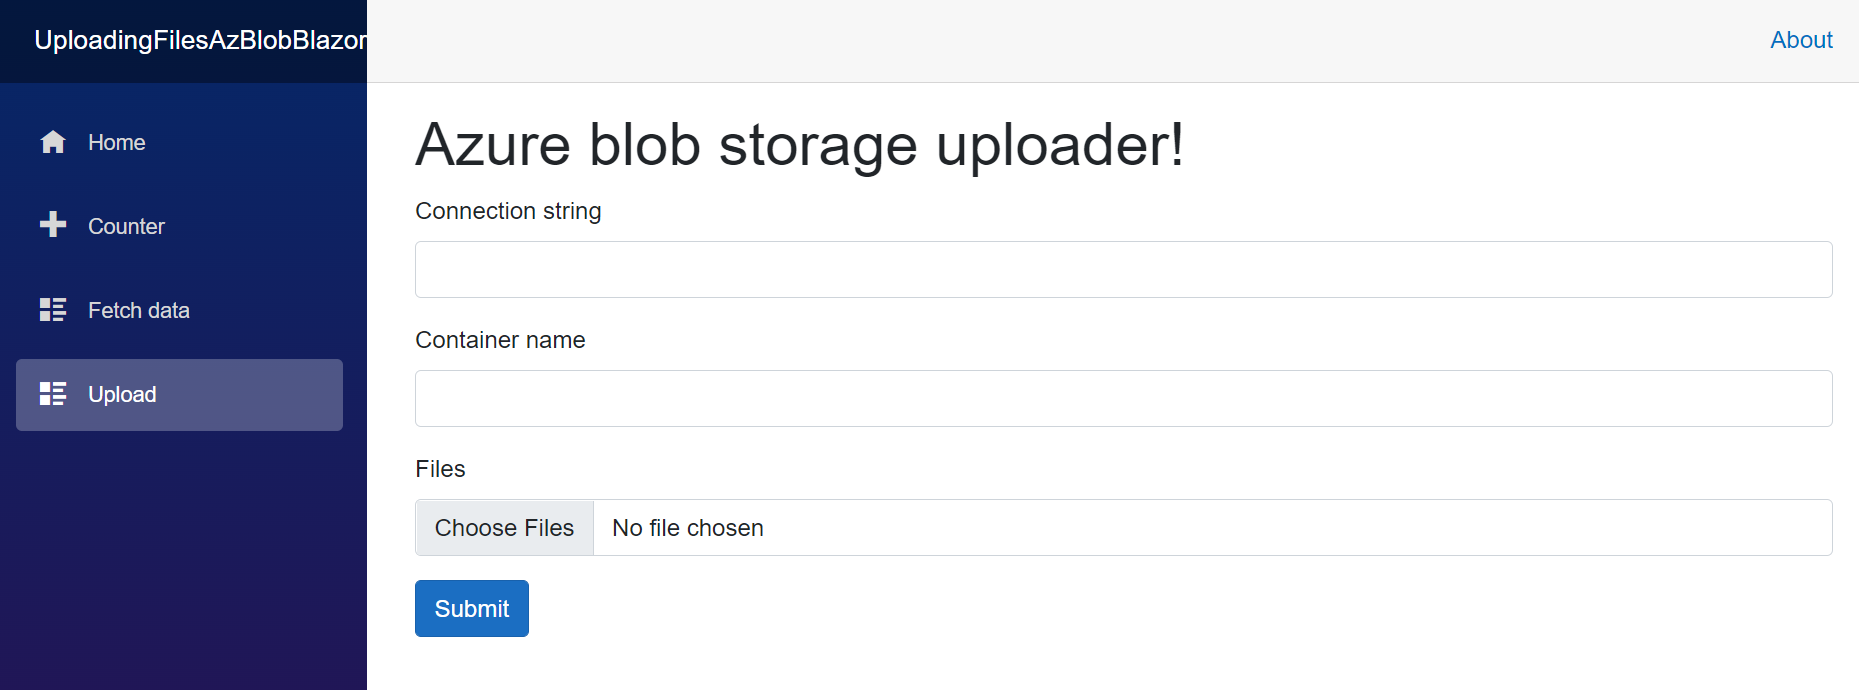
If you press the button to upload and everything is okay, it will display an alert.
Uploading to Azure Blob Storage
Now that we have most of the UI done, let’s now install the package that will handle the Azure Blob Storage API and will let us upload files. Pretty simple.
Add the NuGet package
Let’s manage the NuGet packages from the project and add Azure.Storage.Blob.

Upload to Azure Blob Stoare
Now let’s do the logic for actually uploading the file, normally we would use the connection string and the key from the app.config but for the sake of this tutorial, we use inputs and we supply the data there.
First, let’s add the using for the Azure Blob Storage class
@using Azure.Storage.Blobs
@using Azure.Storage.Blobs.Models
Then we are going to work on the HandleValidSubmit method, which is going to connect to the blob storage, create the container if it doesn’t exist and then upload the files.
private async Task HandleValidSubmit()
{
    try
    {
        // Instantiate container
        var container = new BlobContainerClient(modal.ConnectionString, modal.Container);
        // Create container if not exists
        var createResponse = await container.CreateIfNotExistsAsync();
        // Set access policy
        if (createResponse != null && createResponse.GetRawResponse().Status == 201)
        {
            await container.SetAccessPolicyAsync(Azure.Storage.Blobs.Models.PublicAccessType.Blob);
        }

        // For each file that we have uploaded
        foreach (var file in selectedFiles)
        {
            // New blob
            var blob = container.GetBlobClient(file.Name);
            // Delete any blob with the same name
            await blob.DeleteIfExistsAsync(Azure.Storage.Blobs.Models.DeleteSnapshotsOption.IncludeSnapshots);
            // Create a file stream and use the UploadSync method to upload the Blob.
            using (var fileStream = file.OpenReadStream())
            {
                await blob.UploadAsync(fileStream, new BlobHttpHeaders { ContentType = file.ContentType });
            }
        }

        // Display success message
        await JsRuntime.InvokeVoidAsync("alert", "Files uploaded!");
    }
    catch (Exception e)
    {
        // Display error message
        await JsRuntime.InvokeVoidAsync("alert", "An error ocurred!");
    }
}
Testing the code
Now is time to test the code, in order to do so, just fill the form and click on submit.
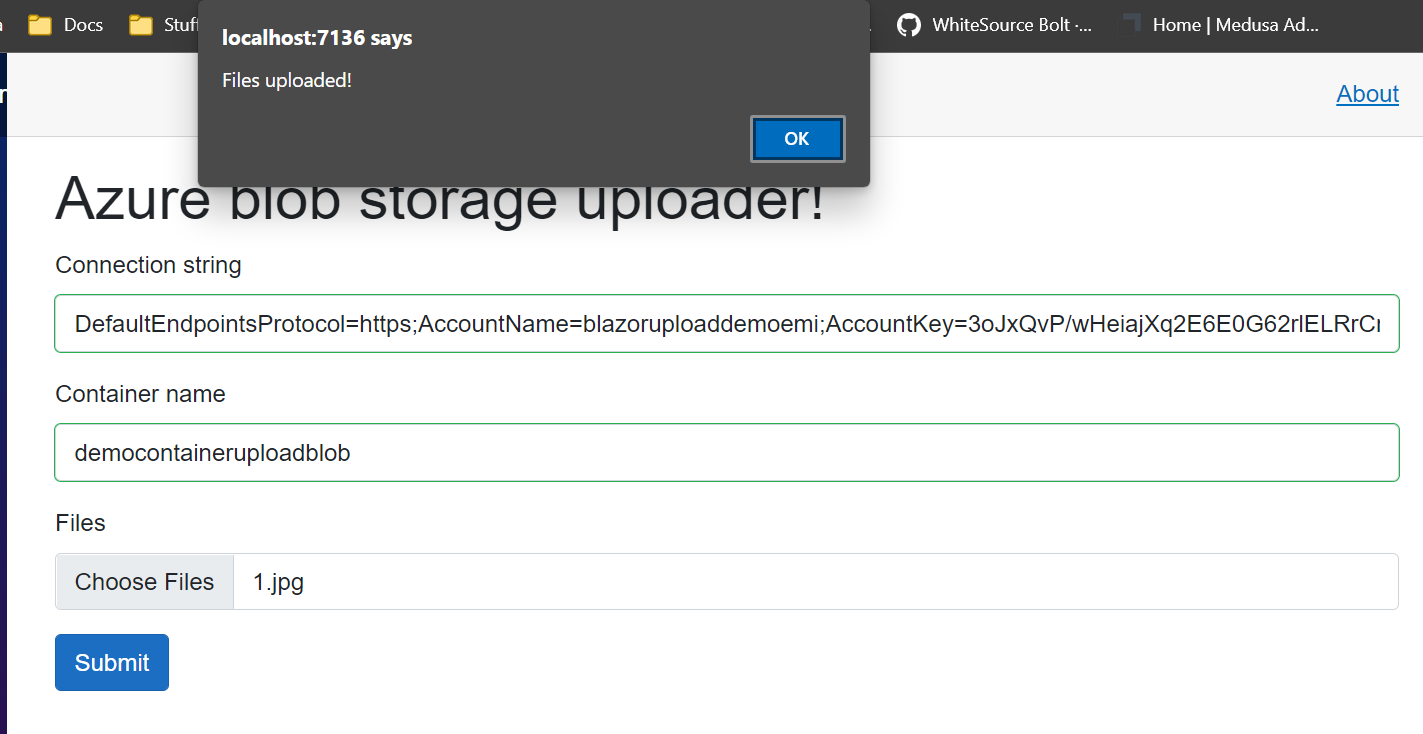
We will display an alert and the file should be uploaded to the Azure Blob Storage, go to the Azure Portal and take a look.
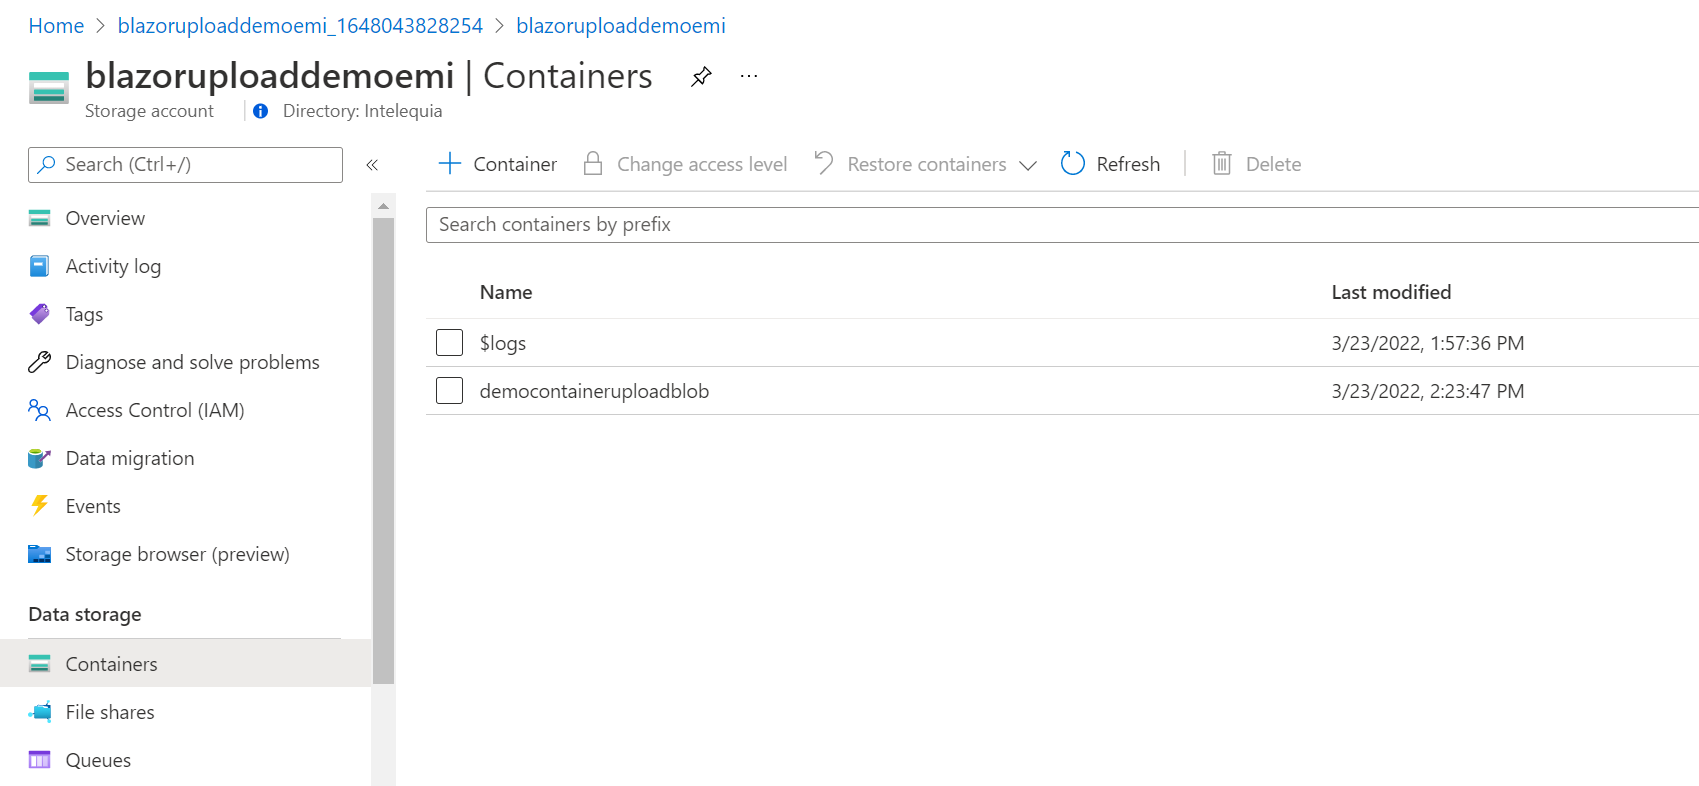
As you can see, the container was also created, now if we get inside the container, we see the file we uploaded.
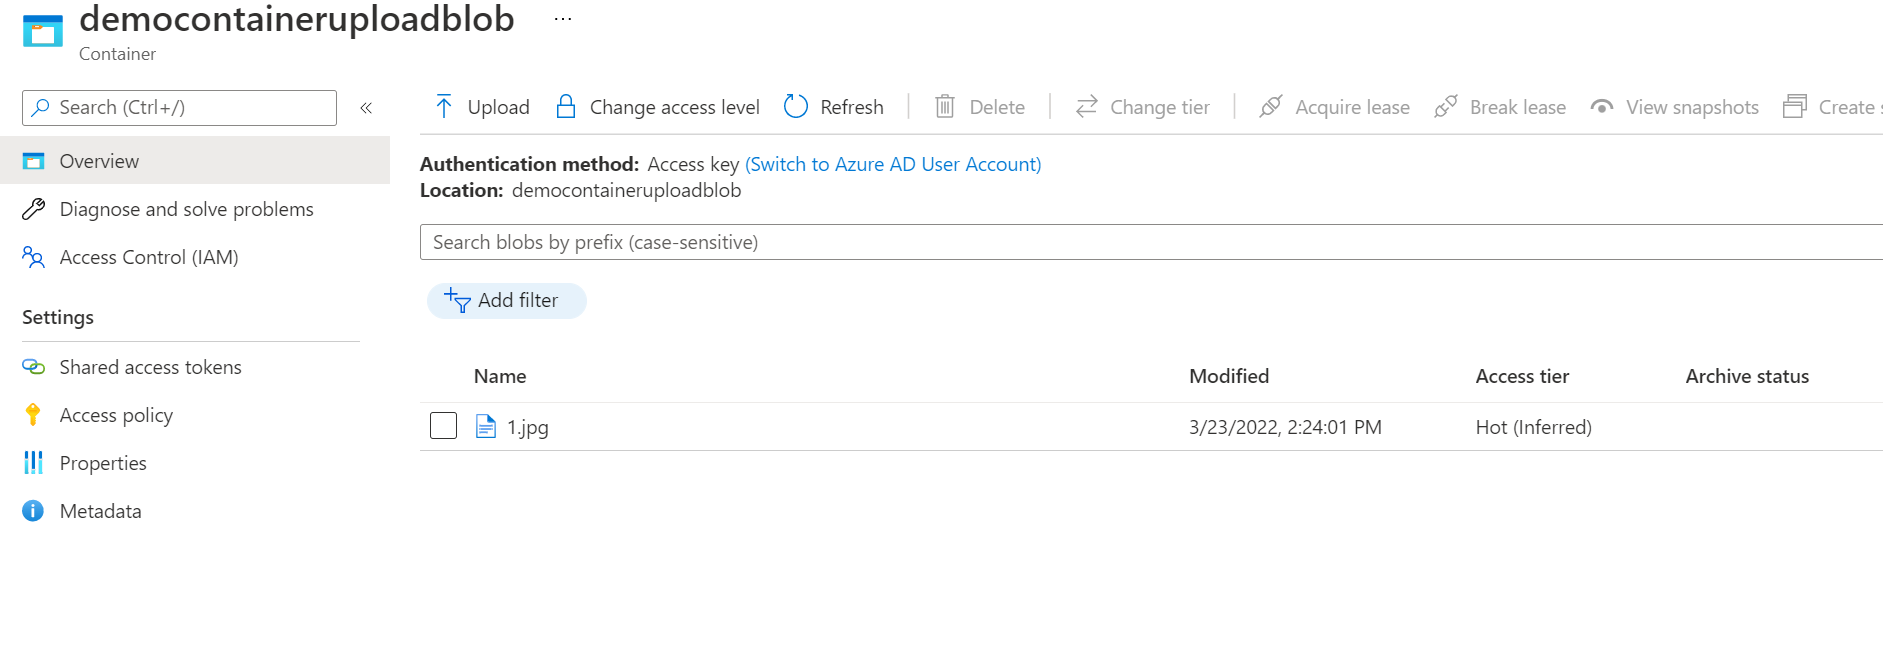
Good job!
Refactor
Now that everything is worked, let’s move the code from the .razor page to a .razor.cs class so it looks better.
If you are using Visual Studio 2022, there’s lightbulb when you hovering are right in the @code, it will show you an option to Extract block to code behind, and it will do as it says!
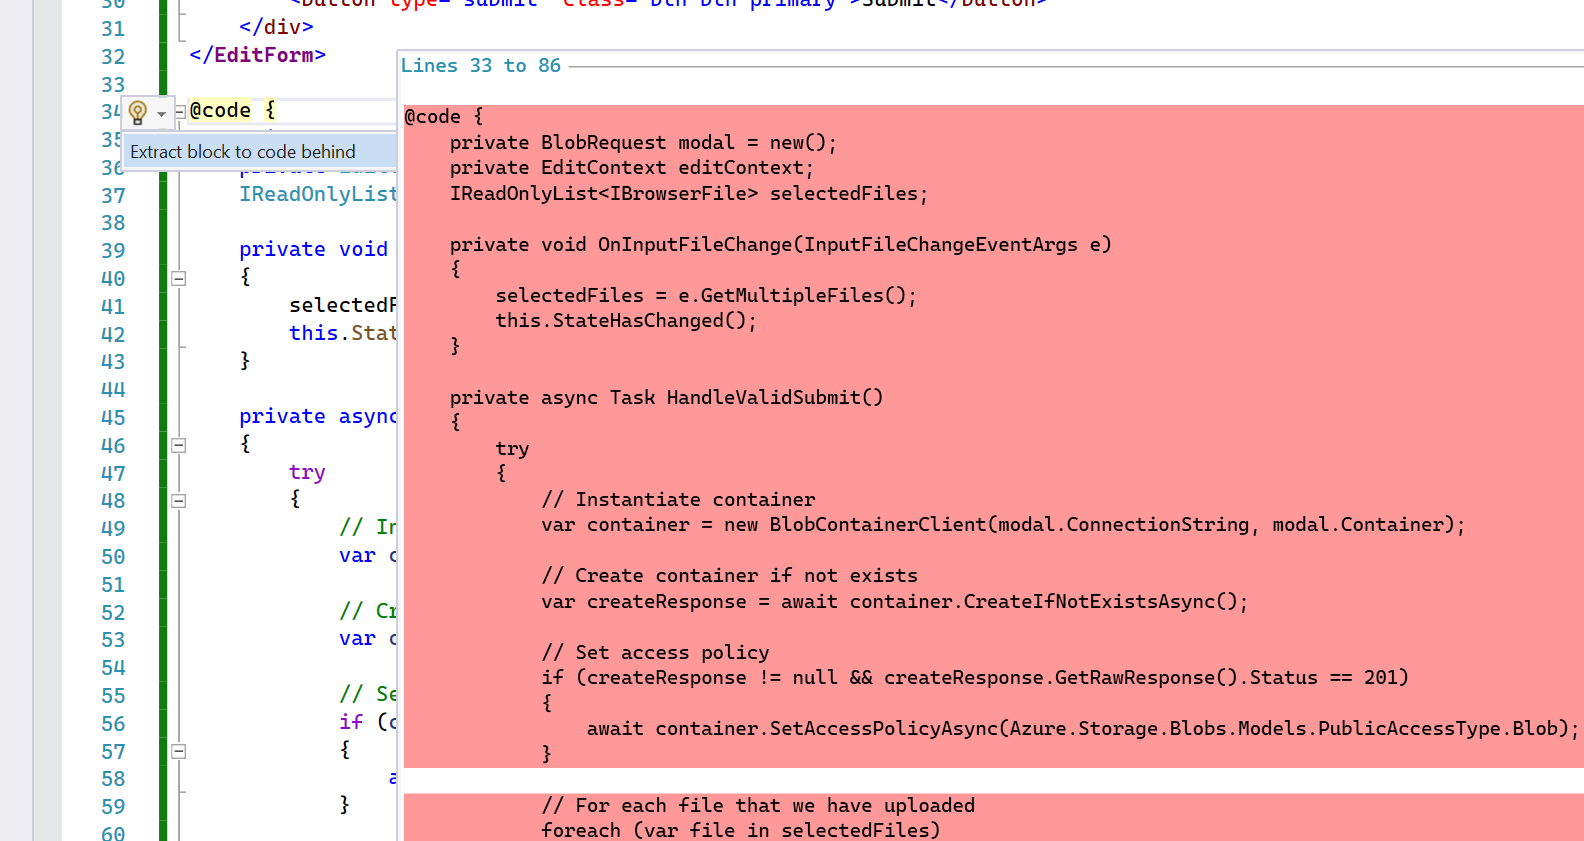
Now you are going to have everything separated and done!
Code
This entire project is on Github and you can find it here!
If you have any issues or question, feel free to contact me on any social media at @emimontesdeoca (in Twitter is actually @emimontesdeocaa with two aa at the end). You can also find most of my socials on the blog’s header.
Hope you liked the post! Cya!